At BTCPVS, we’ve had many customers reach out asking how to effectively use their Ubuntu VPS as a remote desktop. To simplify your setup securely, we’ve created this concise guide on installing XRDP with XFCE, a lightweight desktop environment ideal for VPS servers.
Step 1: Update and Install Packages
Update your system and install XFCE and XRDP:
sudo apt update && sudo apt upgrade -y
sudo apt install xfce4 xfce4-goodies xrdp -y
Enable XRDP to start automatically at boot:
sudo systemctl enable --now xrdpStep 2: Create a New User
For security reasons, it’s mandatory to create a dedicated user for remote desktop access:
sudo adduser yourusername
sudo usermod -aG sudo yourusername
Replace yourusername with your chosen username. You will be prompted to set a strong and unique password.
Step 3: Configure XRDP to Use XFCE
Tell XRDP to launch XFCE when connecting:
sudo -u yourusername bash -c 'echo "startxfce4" > ~/.xsession'
sudo -u yourusername chmod +x /home/yourusername/.xsession
sudo systemctl restart xrdp
Step 4: Connecting to Your VPS
Use an RDP client like Windows Remote Desktop, Remmina (Linux), or Microsoft Remote Desktop (macOS):
- Host/IP: Your BTCPVS VPS IP address
- Port: 3389
- Username/Password: Credentials for your newly created user
If the connection was successful, you should see something like this:
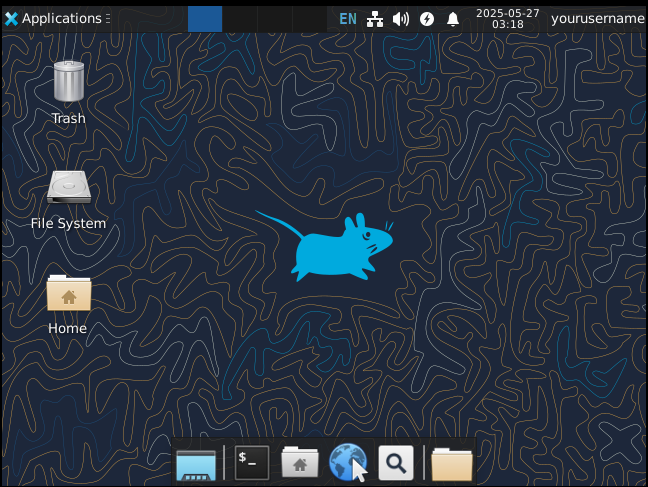
Note: Remote desktop performance may vary depending on your ping and network speed. Additionally, running a graphical user interface can be CPU-intensive. We recommend choosing a higher-specification VPS for smoother performance.
Optional: Installing Additional Software
You can easily install additional software such as Firefox or other applications:
sudo apt install firefox -yTroubleshooting Common Issues
- Blank screen upon connection: Ensure your
.xsessionfile is set correctly. - XRDP not starting: Check status using
sudo systemctl status xrdp.
Conclusion
With XRDP and XFCE installed on your BTCPVS Ubuntu VPS, you gain a secure, straightforward way to remotely manage your server. This setup is perfect for administrative tasks and everyday usage.